
Build your Flutter Apps effortlessly with Docker
Hi folks.
Many of you might run into the trouble of setting up an environment and tools to be able to build your favorite apps but end up quitting because it is too hard to do.
Worry no more, InspireUI has come for the rescue. We introduce you to an easy solution, say goodbye to headache, farewell “OMG! Why is it so troublesome?”. Install once and use it anywhere you like.
Alright. No more nonsense. What you need to do is follow these straight-forward step by step below.
Requirements
- Your computer must have at least 8GB of RAM.
- A Mac or a Windows PC/Laptop.
- A real Android Device.
- Docker Installed. You can download and install it here
- Visual Code installed. Including these plugins: Docker and Remote Development
- SDK Platform-Tools. If you already installed Android Studio, it should be included. To make sure it’s installed, you can check it here.

Initial Setup
- After installing Docker, head to Docker Settings, and set the RAM to at least 8GB. Otherwise, your app might crash during the build.

- Download this flutter_docker folder and extract it.
- Copy your project to the workspace folder inside the flutter_docker folder.

- Open Visual Studio Code (With required plugins installed) and make sure Docker is running.
- Click the Icon where the red arrow points at and select the option Remote-Containers: Open Folder in Container…

- Select and open the flutter_docker folder

- Right-click your project inside Visual Studio Code and select Open in terminal

- Run these commands one by one inside the terminal of Visual Code to switch to flutter stable channel and upgrade it to the latest version. (You can proceed to do the Device Setup while waiting for these commands to complete as it might take 5–20 minutes to finish).
flutter channel stableflutter upgradeflutter doctor
If the final result is similar to this image, you can move to the next section.

Device Setup
Enable developer mode
- Find the Build Number option. The testing device is Samsung Galaxy S9+ so the path will be Settings > About phone > Software information > Build number
- Press it 7 times
- Enable debug mode

Synchronize your Android Device and the System
NOTE: Remember to Allow USB Debugging on your Android Device whenever it appears. Otherwise, this guide will not work. It might happen twice if you follow these steps.
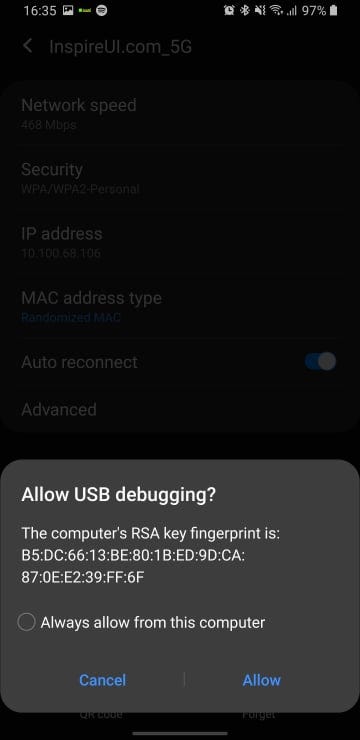
- Connect your Android Device to your Mac/Windows system via USB cable. Remember to Allow USB Debugging
- Open Terminal(Mac)/Command Prompt (Windows). Avoid open terminal inside the flutter_docker folder at this step.
- Find your Android Device IP.

- Run these commands one at a time. Note that your computer and your Android Device have to be on the same network.
adb kill-serveradb tcpip 5555adb connect 10.100.68.106:5555adb devices
And the result will be something like this. If your device IP is not listed, you may do something wrong in the previous steps. In this case, just re-do the steps above.
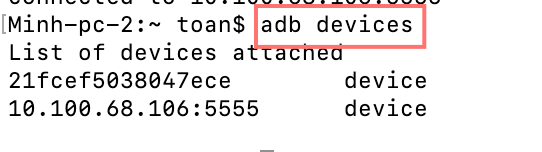
- Disconnect the Android Device connected via USB cable, and again run the command adb devices to verify whether the device is still connected wirelessly.

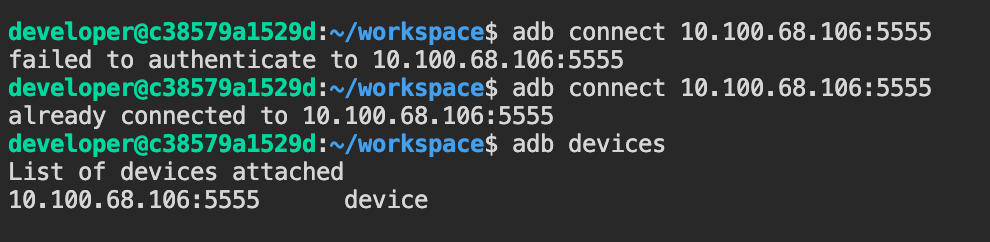
- Back to the terminal that you opened in Visual Studio, and run this command adb connect 10.100.68.106:5555. Remember to Allow USB Debugging on your device. Otherwise, you will get the message “failed to authenticate to”.
- Run the command flutter run. It might take 15–30 minutes to build the app on your first try.
That’s it. Now you can test your app on your device wirelessly.
Comments